Local Stable Diffusion
Stable diffusion (SD) is an AI technique for generating images from text prompts. Similar to DALL-E, which drives the popular craiyon, SD is available as an online tool. These web tools are amazing, and easy to use, but can be frustrating - they're often under high load, and impose long waiting times. They use a good chunk of computational resources, specifically GPUs and so have generally been out of reach for even people with powerful personal machines.
Now, however, SD has reached the point it can be run using (admittedly, high-end) consumer video cards. Stability AI - the model's developers - recently published a blog post open-sourcing SD 2. There's a README for getting started here, but it has a couple of gotchas and assumptions which plenty of people (like myself) won't have known if they're not already familiar with the technologies in use, such as Python and CUDA.
This post is descibes my experience setting up SD 2 on my local workstation. For hardware, I have an i7-6700k, RTX 2080 Super and 48GB of RAM. If you have an AMD video card, you won't be able to use CUDA, but you may be able to use GPU acceleration regardless using something ROCm. In this post I'm using Arch Linux, but I have successfully set it up on Windows too. Python is an exceedingly portable language, so it should work wherever you're able to get a Python installation.
This post assumes that you already have a working Python installation.
Install CUDA
CUDA needs to be installed separately from Python dependencies. It is quite large, and as with all NVIDIA driver installations, can be a bit confusing. On Linux, it's straightforward to install it from your distribution's package manager.
sudo pacman -Syu
sudo pacman -S cuda
On Windows, you will need to go to NVIDIA's site to download the correct version of CUDA. At time of writing, the SD 2 script expects CUDA 11.7, and will not work if you install the latest 12.0 version. To get older versions, go to their download archive and select the appropriate one.
Set up a virtual environment and PyTorch
Python can be installed at a system level, but it's usually a good idea to set up a virtual environment for your project.
This isolates the project dependencies from the wider system, and makes your setup reproducible.
I will use pipenv as it's what I'm familiar with.
PyTorch is a deep-learning framework, used to put together machine learning pipelines.
To get a command to install the relevant dependencies, go to PyTorch's site and choose the options for your setup.
In my case, I replaced pip3 with pipenv as I want to install dependencies to a new virtual environment instead of to the system.
mkdir stable-diffusion && cd stable-diffusion
pipenv install torch torchvision torchaudio
Install Stable Diffusion
SD 2 is provided by the diffusers package.
We can install it in our virtual environment as follows:
pipenv shell
pip3 install git+https://github.com/huggingface/diffusers.git transformers accelerate scipy
exit
We use pipenv shell to enter a shell using the virtual environment, before using the pip3 command described on their README.
After installing dependencies, we can leave the virtual environment shell and return to our original one.
transformers and accelerate are optional, but used to reduce memory usage and so are recommended.
Create a Python script
Python does have an interactive envronment, but so save our fingers let's use a stable-diffusion.py script to contain and run our Python code.
Here I'll mostly copy the Python included in their README:
import torch
from diffusers import StableDiffusionPipeline, EulerDiscreteScheduler
model_id = "stabilityai/stable-diffusion-2"
# Use the Euler scheduler here instead
scheduler = EulerDiscreteScheduler.from_pretrained(model_id, subfolder="scheduler")
pipe = StableDiffusionPipeline.from_pretrained(model_id, scheduler=scheduler, revision="fp16", torch_dtype=torch.float16)
pipe = pipe.to("cuda")
pipe.enable_attention_slicing()
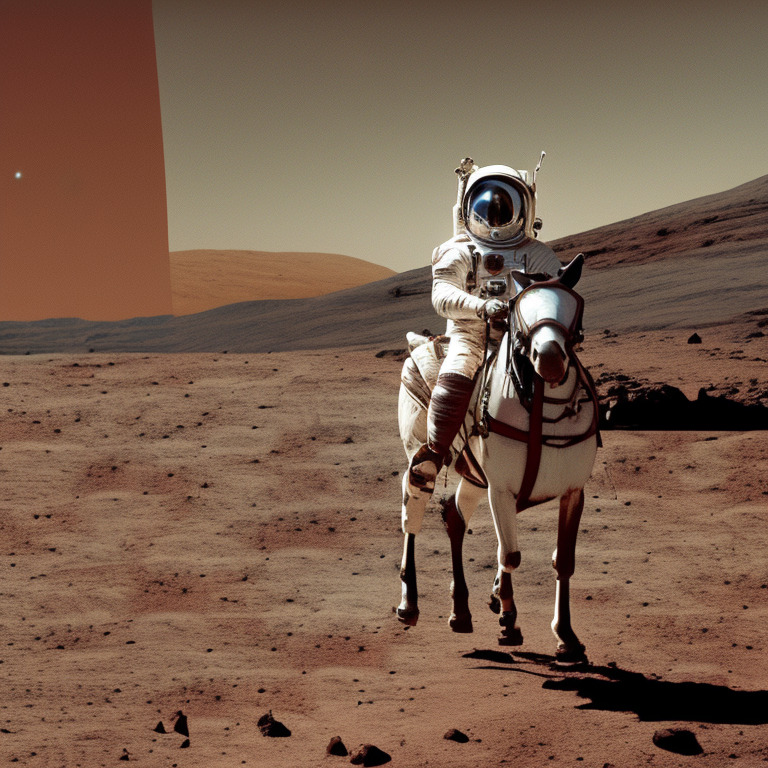
prompt = "a photo of an astronaut riding a horse on mars"
image = pipe(prompt, height=768, width=768).images[0]
image.save("astronaut_rides_horse.png")
I've made two additions here.
First, I've added import torch at the top - I'm not sure why the code in the README omits this, but it's needed to work.
I've also added pipe.enable_attention_slicing() - this is a more memory-efficient running mode, which is less intensive at the cost of taking longer.
If you have a monster video card, this may not be necessary.
At this point, we're done - after running the script successfully, you should have a new picture of an astronaut riding a horse on mars.
Some nice-to-haves
In this basic script we only have the one, hardcoded prompt.
To change it, we need to update the file itself.
Instead, we can change how prompt is set, and have it read from command-line parameters instead.
# at the top of the file
import sys

...

prompt = " ".join(sys.argv[1:])
While we're at it, we can also base the filename on the input prompt:
image.save(f'{prompt.replace(" ", "_")}.png')
Wrapping up
And that's it! Enjoy making some generative art. My favourites so far have been prefixing "psychedelic" to things. I've also been enjoying generating descriptions with ChatGPT and plugging them into SD, for some zero-effort creativity. As always, if anything's out of place of if you'd like to get in touch, please send me an email!.